new blog

Burn marks are one of the most common defects in the injection molding process, significantly affecting the appearance and quality of the final product. This article will provide an in-depth analysis of the root causes of burn marks and offer systematic solutions to address the issue.
What Are Burn Mark Defects?
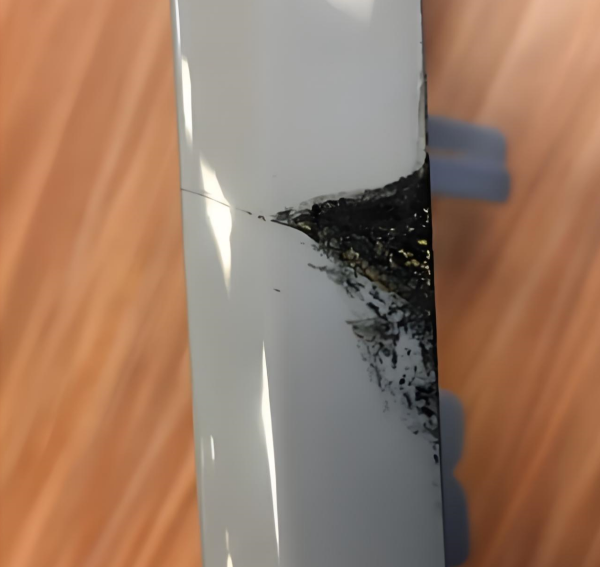
During the injection molding filling process, if gases become trapped within the mold cavity, they may ignite under high pressure, resulting in black, soot-like deposits on the surface of the molded part (as shown in the image). This defect is commonly referred to as "gas trap," "burn marks," or "burning." It is often mistaken for color streaks, yellow marks, or black lines, but its root cause is actually the residue from gas combustion.

Root Cause of Burn Marks:
Where Does the Gas Come From and Why Can't It Escape?
01. Sources of Gas01. Injection Molding Process Factors
1.1 Excessive Filling Speed
When the filling speed is too high, trapped gases are more likely to be sealed inside the mold rather than discharged through the vents.
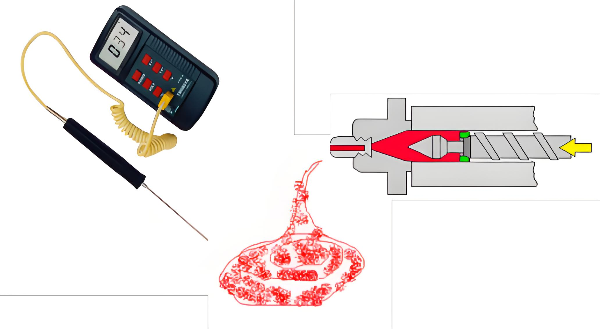
Use a thermometer to directly measure the actual melt temperature.
1.3 Improper Decompression (Suck Back) Settings
Excessive decompression can cause air to be drawn into the melt at the nozzle tip.
Solution:
Check and adjust the decompression amount
If a large decompression value is used to prevent nozzle drooling, first verify whether the nozzle temperature is properly set
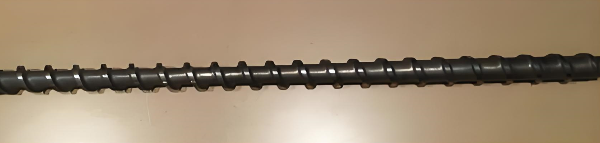
Typical General-Purpose Screw
Solutions:
Ensure the screw’s L/D ratio and compression ratio are appropriate for the material being processed
Check the screw for buildup forming a “barrier thread”, which can obstruct flow and cause degradation
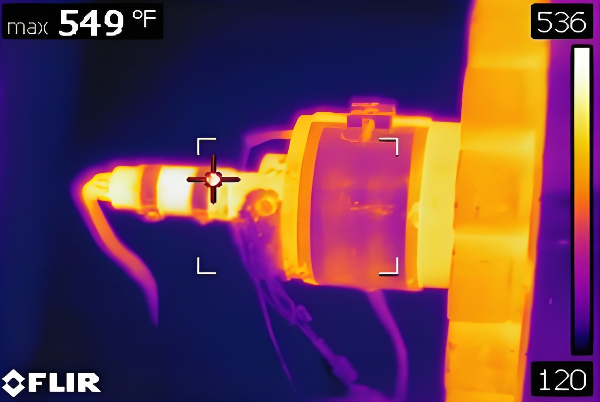
3.3 Barrel Heater Temperature Out of Control
Overheating in localized barrel zones can lead to partial material degradation.
04. Material-Related Factors
4.1 Excessive Moisture Content
For hygroscopic materials, high moisture levels can cause vaporization during processing, leading to gas bubbles in the melt and resulting in burn marks.
Solutions:
Ensure the material is thoroughly dried
Check the performance and settings of drying equipment
4.2 Material Type
Temperature-sensitive materials like PVC and POM (acetal) are more prone to burning.
Case Study:
During a PVC trial run, carbonization marks were observed. It was later found that the issue was due to poor thermal stability of the formulation.
Solutions:
Strictly control barrel temperature
Monitor residence time of the material in the barrel
Ensure there are no dead zones in the plasticizing unit where material can stagnate
4.3 Additive Issues
Color masterbatches and other additives may increase the risk of burn marks.
Solutions:
Use the correct dilution ratio for additives
Ensure additives are compatible with the base resin for injection molding
For dark-colored parts, pay special attention to hidden areas such as rib tips and corners
Conclusion and Recommendations
To effectively resolve burn mark issues in injection molding, follow these systematic steps:
Prioritize Mold Venting Checks – This is the most common root cause.
Investigate Material Factors – Pay close attention to moisture content and material type.
Inspect the Injection Molding Machine – Look for buildup, damaged components, or temperature control issues.
Adjust Process Parameters Last – Optimize filling speed, melt temperature, and other settings only after eliminating equipment or mold-related problems.
Key Principle:
Do not attempt to cover up mold or machine issues by merely adjusting processing conditions. Address the root cause directly.
With thorough troubleshooting and targeted solutions, burn mark defects in injection molding can be effectively eliminated—enhancing both product quality and production efficiency.
follow us :


-- get updates with latest topics

 e-mail
 English
 français
 Deutsch
 русский
 italiano
 español
 português
 العربية
 日本語
日本語 한국의
한국의 中文
中文